Let me tell you a little story about how this pie got its name. It was a rainy Tuesday afternoon, the kind of day that makes you want to curl up with something sweet and buttery. I had a bag of shredded coconut about to expire, some pecans leftover from holiday baking, and a can of sweetened condensed milk staring at me from the pantry. So I did what any sensible home cook would do – I threw them all together with a few other staples and crossed my fingers.
When my husband took that first bite, his eyes got wide and he said the words that would forever name this dessert: “This is stupid good.” Not elegant. Not sophisticated. Just stupidly, ridiculously delicious. And that’s exactly what makes it perfect.
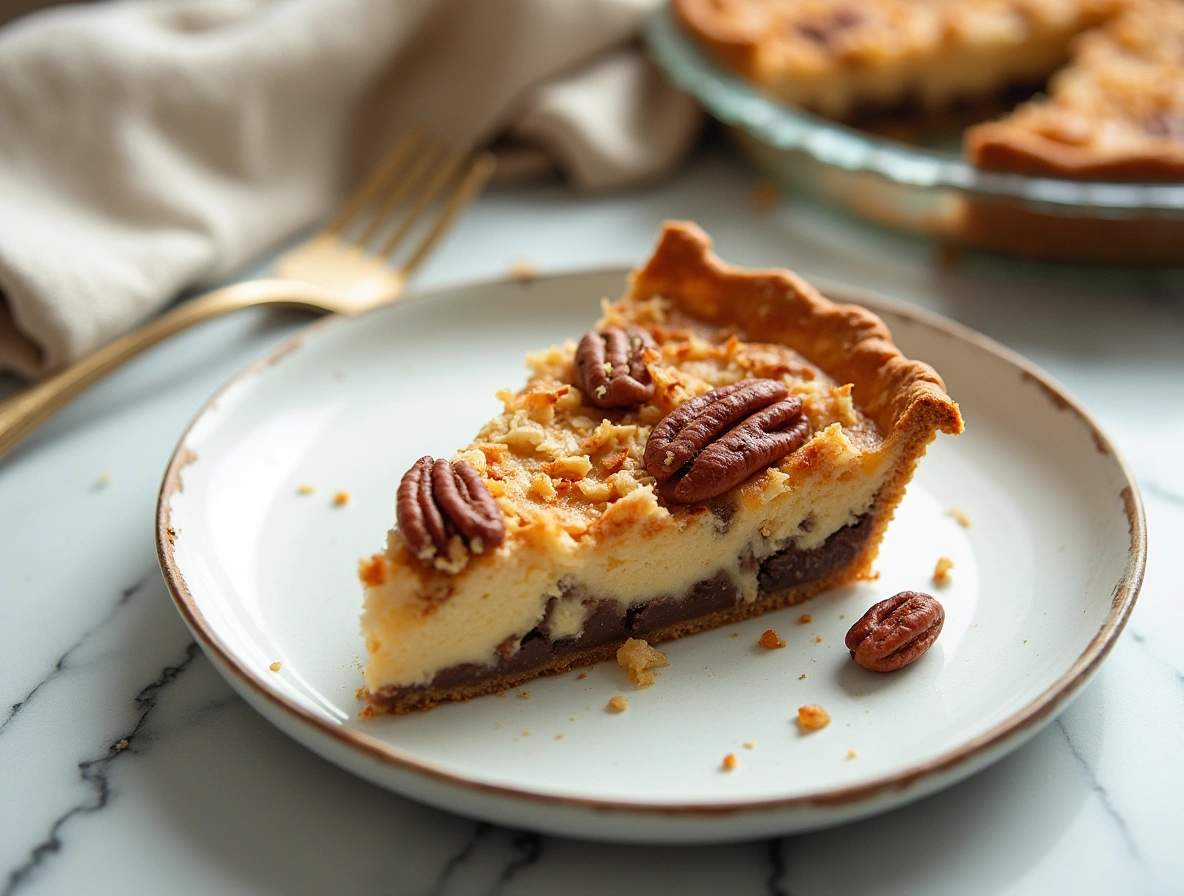
This pie isn’t about fancy techniques or Instagram-perfect layers. It’s about that moment when your fork sinks through crisp pecans and chewy coconut into a custard so rich it makes you close your eyes for a second. It’s about the way your kitchen smells like a bakery while it’s in the oven. Most of all, it’s about how something so simple can become the recipe people beg you to make again and again.
I’ve made this pie dozens of times since that first happy accident, tweaking it here and there until it was just right. The version I’m sharing with you today has all my little secrets – like toasting the pecans first for extra depth, and that handful of chocolate chips that somehow makes everything better. It’s the kind of dessert that feels special enough for company but easy enough for a weeknight treat.

The Magic Behind These Ingredients
When I first started cooking, my grandma taught me something important: great recipes start with understanding your ingredients. Each one in this pie plays a special role, and when they come together, it’s pure magic.
Let’s start with the star players:
Sweetened Condensed Milk
This isn’t just any canned milk – it’s the secret weapon that gives the pie its luxurious texture. Through a slow cooking process, regular milk becomes thick, sweet, and almost caramel-like. When baked with eggs, it transforms into the most incredible custard that holds all our other ingredients together.
Butter (and Why It Matters)
I know some folks try to substitute oil or margarine to cut calories, but please don’t. Butter does three important things here:
- It adds rich, toasty flavor that oil just can’t match
- It helps create that perfect slightly crisp top layer
- It carries all the other flavors so they bloom in your mouth
A little tip from my kitchen – I always use unsalted butter so I can control the saltiness myself. And I melt it just until liquid, not browned, for this recipe.
The Coconut Dilemma: Sweetened vs Unsweetened
This is where you can really make the pie your own. Sweetened coconut gives that classic, almost candy-like coconut flavor that pairs perfectly with the pecans. Unsweetened lets the natural nuttiness of the coconut shine through. I’ve used both depending on my mood and what I have on hand – you really can’t go wrong.
Pecans: The Crunchy Crown
Pecans are expensive these days, I know. But their buttery, slightly sweet flavor is worth it for this pie. Here’s how I get the most out of them:
- Always toast them first (5-7 minutes at 350°F)
- Chop some finely and leave others in bigger pieces for texture
- Reserve a few perfect halves to decorate the top

Vanilla: More Than Just an Extract
That little teaspoon does more work than you might think. It rounds out all the other flavors, adds warmth, and gives that unmistakable “homemade” taste. After years of experimenting, I’ve found Mexican vanilla works beautifully here with its subtle caramel notes.
Step-by-Step: How to Make Magic Happen
Now that we’ve geeked out over ingredients, let’s get to the fun part – actually making the pie! I’ll walk you through each step with all the little tips I’ve learned over the years.
Prepping Your Crust
You’ve got options here:
- Homemade crust – my go-to is a simple butter crust with a pinch of sugar
- Store-bought – absolutely no shame here! Look for the refrigerated kind, not frozen
- Cookie crust – sometimes I crush graham crackers or vanilla wafers for a different twist
Whatever you choose, blind bake it for 10 minutes at 350°F first. This prevents a soggy bottom – my biggest pie pet peeve!
Look this delicious recipe Oreo Honeybun Cake with Cinnamon Cookies’n Cream Icing
The Filling: Where the Magic Happens
- Start by whisking the eggs and condensed milk together until completely smooth. No streaks! This takes about 2 minutes by hand.
- Slowly drizzle in the melted butter while whisking – this helps everything emulsify beautifully
- Stir in the vanilla, then gently fold in the coconut, pecans, and chocolate chips if using
Here’s my pro tip: Let this mixture sit for 10 minutes before pouring into the crust. This lets the coconut hydrate slightly so it doesn’t absorb all your liquid during baking.

Baking to Perfection
Every oven is different, but here’s what to look for:
- 35 minutes: The edges should be set but the center still jiggles slightly
- 40 minutes: Perfect doneness – golden all over with just a slight wobble in the very center
- 45 minutes: Fully set, but risk of drying out
I always bake mine on a sheet pan to catch any drips and for easier handling. And resist the urge to open the oven door too often – patience is key!
The Art of Letting It Rest
I know, I know – you want to dive right in. But trust me on this: letting the pie cool completely (at least 2 hours) makes all the difference.
Here’s why:
- The filling continues to set as it cools
- Flavors meld and deepen
- You get clean slices instead of a gooey mess
That said…if you absolutely can’t wait, I won’t judge you for eating it warm with a spoon. We’ve all been there.
Serving Suggestions That Make It Special
While this pie is amazing all on its own, here are some ways to dress it up:
- A dollop of freshly whipped cream with a hint of bourbon
- Vanilla bean ice cream slowly melting over a warm slice
- A drizzle of caramel sauce for extra decadence
- A sprinkle of flaky sea salt to balance the sweetness
For holidays, I sometimes arrange pecan halves in a pretty spiral on top before baking. It’s those little touches that make people feel special.

Troubleshooting: Common Pie Problems Solved
Even the best bakers run into issues sometimes. Here’s how to avoid common pitfalls:
Soggy Bottom Crust
- Always prebake your crust
- Make sure your filling isn’t too liquidy
- Bake on the lower oven rack
Overbrowning Edges
- Use a pie crust shield or foil ring after 20 minutes
- Tent the whole pie if needed in the last 10 minutes
Cracked Filling
- Don’t overbake! Remove when center still jiggles slightly
- Cool gradually – don’t refrigerate until fully cooled
Make-Ahead Magic
One of the things I love most about this pie is how well it keeps:
- Room temperature: 2 days covered
- Refrigerator: Up to 5 days (the flavors actually improve!)
- Freezer: Up to 3 months (wrap tightly in plastic then foil)
To serve after freezing, thaw overnight in the fridge then bring to room temperature or warm slightly in the oven.
Variations to Keep It Interesting
Once you’ve mastered the basic recipe, try these fun twists:
- Tropical Version: Add 1/4 cup diced dried pineapple and macadamia nuts
- Chocolate Lover’s: Swap half the coconut for cacao nibs
- Spiced: Add 1/2 tsp cinnamon and a pinch of nutmeg
- Salty-Sweet: Top with a sprinkle of fleur de sel before serving
The Story Behind the Recipe
Every great recipe has a history, and this one is no exception. While the “stupid good” moment happened in my kitchen, the roots go back much further.
My grandma used to make something similar she called her “Desperation Pie” – a throw-together dessert for unexpected guests. Her version used walnuts instead of pecans and didn’t have chocolate (a tragedy in my opinion). When I was little, I’d stand on a stool next to her counter, “helping” by stirring the filling and sneaking bits of coconut.
Over the years, I’ve made it my own – adding the chocolate chips after a happy accident when some fell in while I was baking with my kids, increasing the vanilla because I love that warm aroma, perfecting the baking time through lots of trial and error.
That’s what I love most about cooking – how recipes evolve and become part of your family’s story. Maybe someday your grandkids will be making this pie and telling stories about you.
Frequently Asked Questions
Can I use a different nut?
Absolutely! Walnuts are the closest substitute, but almonds or hazelnuts would work too in a pinch. Just be sure to toast them first.
Is there a way to make this dairy-free?
You can try coconut oil instead of butter and use a dairy-free condensed coconut milk. The texture will be slightly different but still delicious.
Why did my pie puff up then sink?
This happens if it’s slightly underbaked. Next time, bake until the center is just set – no major jiggle. The slight sink is normal though!
Can I double this recipe?
Yes! Use a deep dish pie plate or divide between two regular plates. Baking time may increase by 5-10 minutes.

Final Thoughts from My Kitchen to Yours
At the end of the day, this Coconut Pecan Stupid Pie isn’t really about the ingredients or the technique. It’s about that feeling you get when you take your first bite and can’t help but smile. It’s about the way your house smells while it bakes. The way people gather in the kitchen, drawn by the aroma. The satisfied silence that falls over the table when everyone’s too busy eating to talk.
That’s why I cook – to create those moments of pure, simple joy. And this pie delivers that in every buttery, coconutty, pecan-packed bite.
So go ahead – make it for your next family dinner, potluck, or just because it’s Tuesday. Take pictures, make memories, and most importantly – enjoy every bite. And when someone tells you it’s stupid good? Just smile and say “I know.”
Tag me if you try it – I love seeing your creations! Now if you’ll excuse me, I think it’s time to go make another pie…
More Recipes You Might Love
- Grandma’s Famous Banana Pudding
- The Best Damn Chocolate Chip Cookies
- Peach Cobbler That’ll Make You Swear Off Restaurants
Happy baking, friends!
Anna
P.S. Want the printable version of this recipe with exact measurements? Drop your email below and I’ll send it right over!